Design a Spectacular Composition with These Steps and Painting Tools

[Sponsored] The design of a painting plays a significant role in capturing—and holding—a viewer’s attention, so it must be considered from the very beginning of the creative process. I take a targeted approach—literally. Let’s walk through it at a high level, then I’ll show you my toolkit and a step-by-step demo using one of my paintings.
Define a Target Area
I aim for a design that keeps the greatest contrasts, the warmest colors, and highest intensities concentrated in a “target” area—an area of the painting where I want to direct more attention—and I don’t hesitate to make any necessary alterations to the subject to make that happen. Typically, these alterations are just simple adjustments in contrast and consolidation or a lost edge here and there, but sometimes I might move a whole house or some trees to the left or right—or even out of the picture entirely—if it serves the composition.
Begin Building
Once I have a rough plan for the composition, I begin by laying in the big shapes. I build patterns of major masses from “families” of light and shadow and try to connect these families where I can in order to form a contiguous flow that enters one edge of the canvas and exits another. It’s a push-and-pull process in the foreground, middle ground, and background, using lighter or darker tones, higher or lower intensities, more or less contrast, and harder or softer edges to capture an illusion of depth.
Invite the Viewer In
Lastly, I make sure there’s a distinct entry point to the scene that pulls in the viewer. Values, color, harmony, intensity, contrasts, edges and drawing—they all work together to construct an engaging design that invites a viewer on a guided tour through the painting.
Artist Toolkit
Paints
Utrecht Artists’ Oil Colors: titanium white, and (from warm to cool) cadmium lemon yellow pure, cadmium yellow light pure, cadmium orange pure, cadmium red medium pure, alizarin crimson, ultramarine blue, phthalo green blue shade
Surface
A standard board with two sanded coats of Utrecht Artists’ Professional Acrylic Gesso
Brushes
Blick MasterStroke Interlocking Bristle Brushes, Nos. 4, 6, 8 and 10 flats Medium
Utrecht NOOD™ Odorless Paint Thinner
NOOD™ (short for “no odor”) is a pure, odorless, slow evaporating thinner that can be used with Artists’ Oil Colors as an alternative to turpentine and other conventional solvents. Evaporation is very slow, allowing for longer periods of paint manipulation. NOOD™ can be used in combination with linseed, safflower, walnut and poppy oil mediums, and is also excellent for use as a brush cleaner.
Shop: All tools and materials are available at DickBlick.com
Step-by-Step Demo
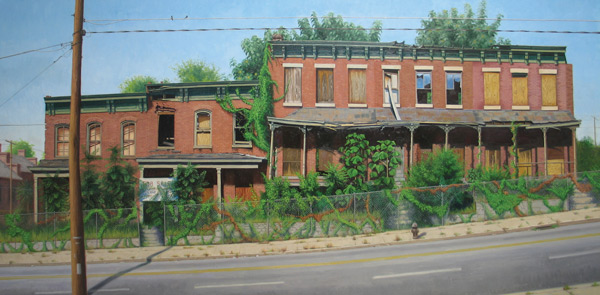
Step 1: Select a Reference Photo

I selected this image I took of a barn and outbuildings in Michigan as the reference photo for my painting. I liked how the buildings are situated on a slight hill and how they’re bathed in warm morning sunlight and yet set apart by the cool shadows of the tree line in the background. I knew right away that I’d want to remove a portion of the foreground fence from the design.
Step 2: Plan for Design

As I plan, I make sure to (1) determine a lead-in, (2) devote one area to highest contrasts, richest color, etc., as a focus area, (3) consolidate the values and colors in areas that appear busy, (4) remove unnecessary obstacles such as fences or roads that block the viewer’s path through the painting, and (5) address areas of reflected light and other details.
Watch my Blick Studio Live video on reflected light to learn more.
Step 3: Blocking In

Starting with big shapes and moving to smaller, I fill in as much of the painting as I can before starting the details. I’m careful to take my time and mix my colors thoughtfully because this is the stage that really determines whether the painting will succeed.
Step 4: The Finish

I added more variety to the foreground grasses—creating areas of both warm color and less-warm color. Next, I painted a few limbs and tree trunks in the background, being careful not to overdo it. I worked carefully up to this point so as not to upset any of the established relationships. After I had created clean color changes among the masses all around the picture, I added some tiny areas of exaggerated temperature and color shifts to areas of the painting that I wanted to “pop.” Often, I’ll do this in and around the focal area to add some boldness that sets it apart.
Meet the Artist
Find Your Materials
This article was sponsored by Blick.


Excellent demo of still life by Troy Kilgore! Great explanation of the reflected color and demo. Thank you.